800.942.4447


 Addresses
 Wallet
 Orders
 Invoices
 Item History
 Favorites
 Change Password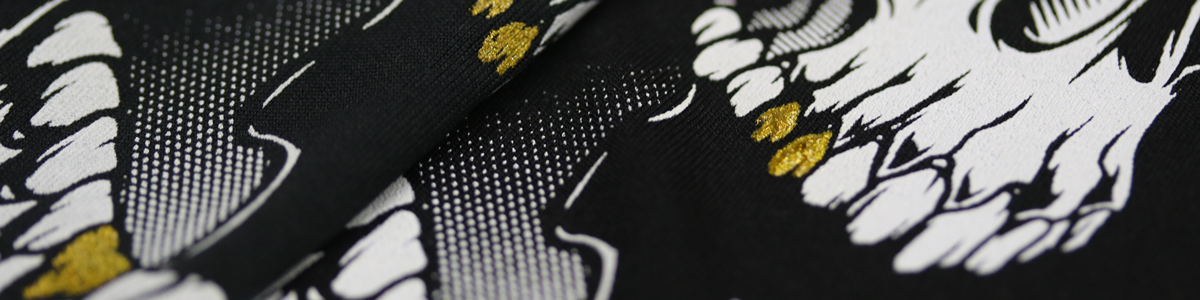
The best screen printing ink for fine detail work is not simply the thinnest ink or the most opaque ink. It must flow through the selected mesh, release cleanly from the stencil, hold small lines and halftone dots, and cure properly even when the printed ink deposit is relatively thin.
Fine detail is also the result of an entire printing system. The ink matters, but so do the artwork, mesh count, screen tension, emulsion, exposure, squeegee, off-contact, printing pressure, underbase, and fabric. A precision ink cannot compensate for a screen that never captured the detail correctly.
What Is The Best Ink For Fine Detail?
For true halftones, photographic images, and four-color process printing, start with an ink designed for high mesh counts and controlled ink deposits. In our product chooser, EZ Process Series is listed for 230 to 355 mesh, making it the clearest starting point for our highest-resolution process work.
For fine spot-color lines, small lettering, and detailed illustrations, a smooth general-purpose plastisol may be more appropriate than a transparent process ink. Our 480 Series can be printed through mesh counts up to 230 and is designed to print easily on light garments or over a white underbase. It is also well suited to wet-on-wet production because it resists building up on the backs of subsequent screens as quickly as heavier opaque inks.
For a soft, lower-temperature print, Watercolor LC Series can be printed through 125 to 230 mesh, and four-color process colors are available. It provides a water-based-style feel without drying in the screen and can cure at approximately 250°F.
The right answer therefore depends on the artwork:
- Use process ink for photographic halftones and color blending
- Use a smooth fine-mesh-compatible spot color for small lettering and line art
- Use a controlled underbase system for detailed designs on dark garments
- Use specialty ink only when its particles can pass through the required mesh
What Fine Detail Requires From The Ink
An ink intended for precision printing should have several important characteristics.
- It should pass through the selected mesh without excessive pressure
- It should shear smoothly beneath the squeegee
- It should release cleanly instead of remaining inside the stencil
- It should maintain sharp edges without spreading excessively
- It should cure reliably in a relatively thin deposit
- Its pigments or effect particles must be small enough for the mesh openings
- It should remain consistent throughout the production run
Maximum opacity is not always the goal. Heavy high-opacity ink generally requires a larger deposit, while fine detail usually benefits from a thinner and more controlled deposit. Trying to force a heavy white or coarse specialty ink through extremely fine mesh can produce incomplete prints, excessive pressure, distorted dots, and clogged image areas.
Process Printing And Spot-Color Detail Are Different
Four-color process printing normally uses transparent cyan, magenta, yellow, and black inks. The colors overlap in controlled halftone patterns to create the appearance of a full-color image. Because the dots are small and the deposit must remain controlled, process inks are normally printed through higher mesh counts.
Spot-color printing uses a separate premixed color for each portion of the design. A detailed spot-color illustration may contain very small type and thin lines, but it does not rely on transparent CMYK colors blending together. A smooth general-purpose ink may therefore be a better choice than a process ink.
On dark garments, printers often use simulated process printing. This combines a controlled white underbase with separated spot colors and halftones. The underbase, top colors, and separations must work together. An underbase that is too large or too heavy can close the negative spaces between dots and eliminate the detail before the top colors are printed.
Choose A Mesh Count That Supports The Artwork
Higher mesh counts have smaller openings and can hold finer lines and halftone dots. However, selecting the highest mesh available does not automatically improve the print. The ink still needs sufficient open area to pass through the screen, and the finished print still needs enough ink to remain visible and durable.
General starting points for textile printing include:
- 156 to 180 mesh for moderately detailed spot-color artwork
- 200 to 230 mesh for finer lettering, thin lines, and many textile halftones
- 280 to 355 mesh for especially fine process work and highly controlled deposits
These are starting ranges rather than universal rules. Thread diameter, mesh opening, fabric texture, ink type, stencil thickness, halftone frequency, and desired opacity all affect the final selection.
As a rough guideline, many printers use a mesh count approximately four to five times the halftone line count. For example, 230 mesh may be a practical starting point for a 45 to 55 line-per-inch halftone. The correct combination should always be confirmed with an exposure and print test.
Our 23" x 31" Aluminum Screens are available in mesh counts ranging from 24 to 355, including white and dyed mesh. High screen tension and a frame that remains stable are especially important when small registration errors can visibly change a detailed image.
Screen Tension Affects Print Resolution
A properly tensioned screen separates from the ink deposit immediately behind the squeegee. This clean release helps preserve line edges and halftone dots.
Low or uneven tension allows the mesh to remain in contact with the wet ink for too long. The image can smear, dots can grow, and additional pressure may be required to clear the screen. Registration may also shift across a multicolor design.
Saatilene Hi-R Mesh is a high-modulus, low-elongation mesh designed to maintain tension and hold finer detail without sacrificing stencil durability. Whatever mesh is used, it should be stretched evenly and matched to the frame size and artwork.
The Stencil Must Capture The Detail First
The ink cannot print an image that the stencil failed to reproduce. Thin lines and small halftone dots require a clean, evenly coated screen, a dense film positive, strong contact during exposure, and an exposure time that is properly tested.
Underexposure can leave the stencil soft and cause fine areas to break down on press. Overexposure can close small openings and eliminate highlight dots. Poor contact between the film and emulsion allows light to spread beneath the edges of the artwork, reducing definition.
Fine-detail screens normally benefit from a controlled, uniform stencil rather than an unnecessarily heavy emulsion deposit. The stencil must still create a proper gasket against the garment, but excessive thickness can increase ink deposit and cause fine elements to spread.
Saatichem Graphic HU 42 is a dual-cure emulsion designed for excellent print definition, fine detail, and halftone work. For printers who want highly repeatable stencil thickness, Chromaline Quick Film is a capillary film designed for consistent screens and excellent halftone imaging.
Use A Sharp, Controlled Squeegee
A very soft squeegee bends deeply during the print stroke and lays down a heavy ink deposit. That may be useful for glitter or high-opacity printing, but it can cause line growth and fill small negative spaces in detailed artwork.
A sharper, harder blade normally provides better deposit control. A 70-durometer blade is a common general-purpose choice. An 80-durometer blade deposits less ink and can provide better print resolution. On automatic presses, a supported dual- or triple-durometer blade can resist excessive flexing while maintaining a printable edge.
Our Squeegee Rubber is available in single, dual, and triple durometers so the blade can be matched to the press and desired ink deposit.
Regardless of durometer, the edge must remain sharp. A rounded or damaged blade pushes more ink through the stencil and makes detailed printing less predictable.
Use Only Enough Pressure To Clear The Screen
Excessive squeegee pressure does not create better detail. It bends the screen, drives the ink sideways, enlarges halftone dots, and can distort fine lines. The goal is to use enough pressure to shear the ink and clear the stencil without crushing the image into the garment.
Fine-detail printing normally benefits from:
- A sharp squeegee edge
- Consistent screen tension
- Controlled off-contact
- A smooth, repeatable stroke
- Only enough pressure to clear the image
- A complete but controlled flood stroke
A second print stroke may increase coverage, but it can also increase dot gain and make small lettering heavier. Do not automatically double-stroke a detailed design. Compare one-stroke and two-stroke test prints before selecting the production method.
Prepare The Ink Before Adding Reducer
Plastisol may appear thick while it is sitting in the container. Bring the ink to room temperature and mix it thoroughly before deciding that it needs to be reduced. Plastisol is shear-thinning, so it often becomes easier to print after mixing and working on press.
Adding too much reducer may weaken opacity, increase spreading, alter the deposit, and make the finished color less predictable. Never add water, screen wash, mineral spirits, or an unapproved solvent to plastisol ink.
When a small viscosity adjustment is genuinely required, Visco Minus is designed to lower plastisol viscosity without unnecessarily harming color strength or stability. Add only a small amount, mix completely, and test the ink through the actual production screen before adding more.
Fine Detail On Dark Garments Requires A Controlled Underbase
Dark garments normally require a white underbase so the top colors remain bright. However, a heavy underbase can become the biggest obstacle to fine detail.
For detailed dark-shirt printing:
- Choke the underbase slightly so it does not extend beyond the top colors
- Use enough mesh to control the white deposit
- Keep small negative spaces open
- Flash only until the surface is ready for the next screen
- Avoid excessive pressure that spreads the underbase
- Confirm that the top colors register without filling the halftones
The underbase does not need to be a finished bright white print by itself. Its purpose is to create a consistent foundation for the colors above it. A smoother and more controlled base usually preserves detail better than an unnecessarily thick one.
The Garment Can Limit The Detail
Ink and screen quality cannot completely overcome a rough printing surface. Fine lines and small halftone dots reproduce more accurately on smooth, tightly knit fabric than on coarse fleece, heavy ribbing, canvas, or highly textured garments.
Fabric fibers can break up thin lines or show through a small ink deposit. Before promising extremely fine reproduction, test the artwork on the exact garment style and color being used.
Polyester adds another concern. High curing and flashing temperatures can activate garment dyes and cause migration into the print. When working on polyester, the ink system must balance fine-mesh printability with bleed resistance and an appropriate cure temperature.
Specialty Inks Have Different Detail Limits
Large particles cannot pass through small mesh openings. Glitter, sparkle, and some reflective inks require coarse mesh and are not appropriate for extremely fine lines or halftones.
Metallic ink provides a useful example. Our 180 Metallic Series can produce substantially better detail than glitter ink. Within that series, the Liquid Silver, Liquid Gold, and Liquid Red formulas are designed to print through finer mesh counts, making them the better choices when metallic artwork includes fine detail.
The tradeoff is that a fine liquid metallic effect may appear less aggressive than a coarse sparkle or glitter deposit. Choose the ink based on whether detail or maximum visual texture is more important.
Common Reasons Fine Detail Disappears
When small lettering closes or halftones become muddy, the ink is not always the cause. Common problems include:
- Mesh count that is too low for the artwork
- Ink or effect particles that are too large for the mesh
- A stencil that is too thick
- Poor film-positive density
- Incorrect exposure time
- Poor contact between the film and screen
- Low or uneven screen tension
- A soft or rounded squeegee
- Excessive printing pressure
- Too many print strokes
- An underbase that was not choked
- Over-flashing that makes the next screen skid
- Registration movement during production
- A garment surface that is too coarse for the intended detail
Change one variable at a time during troubleshooting. Changing the mesh, squeegee, reducer, pressure, and exposure simultaneously makes it difficult to identify what solved or caused the problem.
How To Test A Fine-Detail Setup
Create a test image containing the smallest type, thinnest positive and negative lines, and halftone range you expect to print. Include registration marks and areas of solid color so you can evaluate both detail and coverage.
Inspect the developed screen before placing it on press. If the smallest details are already missing, correct the screen-making process before testing the ink.
Use Pellons (Test Squares) for initial setup and registration, but approve the final print on the actual garment. Fabric texture, stretch, color, and dye content can produce a different result than a smooth test material.
After printing:
- Allow the sample to cool
- Inspect fine lines and halftones under magnification
- Compare the print with the original artwork
- Look for dot gain, dot loss, filling, and broken lines
- Confirm the color and opacity
- Verify complete cure
- Perform stretch and wash testing
Record the mesh count, thread type, emulsion, coating method, exposure time, squeegee durometer, off-contact, pressure, stroke speed, flash settings, and curing settings. Those records make a successful detailed print much easier to reproduce.
Final Recommendation
For the finest halftones and true process work, choose an ink system designed for high mesh counts. Our product matrix lists EZ Process Series for 230 to 355 mesh, making it our strongest starting point for highly detailed process printing.
For fine spot-color work on cotton or over a white underbase, 480 Series provides an easy-printing general-purpose option that can run through mesh counts up to 230. For soft, low-temperature work with available process colors, consider Watercolor LC Series. For detailed metallic artwork, the liquid formulas within the 180 Metallic Series are more suitable than coarse glitter or sparkle inks.
Most importantly, treat fine-detail printing as a complete system. The correct ink must be paired with high-quality artwork, stable mesh tension, a properly exposed stencil, controlled squeegee pressure, and an appropriate garment. When every part of that system is working together, thin lines remain open, halftones stay clean, and the finished print reproduces the detail the customer approved.