800.942.4447


 Addresses
 Wallet
 Orders
 Invoices
 Item History
 Favorites
 Change Password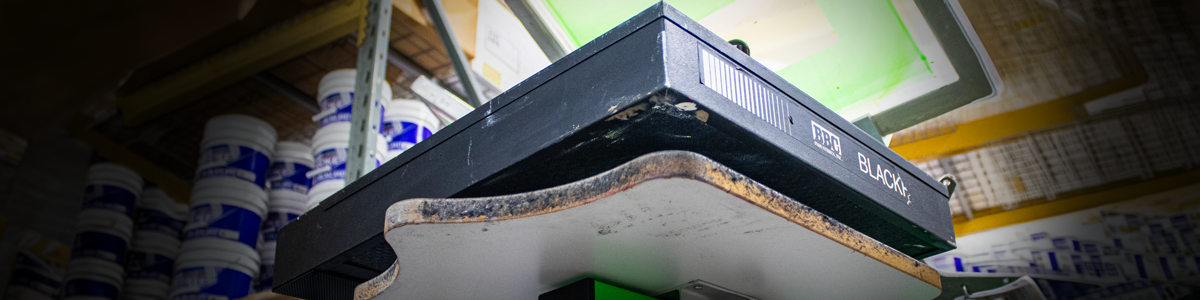
The correct screen printing ink flash temperature is not a single number that works for every ink, garment, and press. The goal of flashing is to gel the surface of the printed ink just enough that the next screen can print over it without picking up, smearing, or disturbing the underbase.
A flash is not supposed to fully cure the ink. Final curing occurs after all colors have been printed. Using more flash heat than necessary can slow production, increase dye migration, damage garments, and make later colors difficult to print.
Flashing And Curing Are Different
Plastisol ink cures when the entire ink deposit reaches the temperature required by its formula. During flashing, only enough heat is applied to stabilize the surface temporarily.
A properly flashed underbase should:
- No longer transfer to the next screen
- Remain slightly flexible rather than hard and rubbery
- Accept the next ink layer cleanly
- Stay attached to the garment during the remaining print sequence
If the underbase is completely cured during the flash, the top colors may slide, build up on the following screens, or have difficulty bonding to the surface.
What Temperature Should Plastisol Reach During Flashing?
The safest answer is the lowest temperature and shortest exposure that gels the ink enough for the next print station.
The required temperature varies according to:
- Ink series and color
- Thickness of the ink deposit
- Mesh count and stencil thickness
- Flash unit wattage and distance
- Garment color and fabric
- Platen temperature
- Production speed
Do not assume that the ink's final cure temperature is also its proper flash temperature. A standard plastisol that ultimately cures around 320°F does not need to reach full cure beneath the flash unit.
Follow the technical instructions for the specific ink and establish the shortest successful flash through testing.
Measure The Ink Surface, Not The Flash Panel
The temperature of the flash heating element is not the same as the temperature of the printed ink. Distance, exposure time, garment color, platen temperature, and air movement all affect how much heat reaches the print.
Two flash units with the same power rating may produce different ink temperatures. Likewise, moving the flash one inch closer can create a major change even when the control setting remains the same.
Measure the printed surface while developing the setup, then document the flash height, time, and power level that produce the desired result.
Start With A Controlled Flash Test
Before production:
- Print the underbase using the planned mesh and number of strokes.
- Place the garment beneath the flash at a consistent distance.
- Begin with a short exposure.
- Allow the print to move away from the flash.
- Check whether the surface transfers or smears.
- Increase exposure gradually only when necessary.
- Print the next color and inspect screen pickup and adhesion.
Use the same garment, ink deposit, and press speed planned for production. A thin test print may flash much faster than a heavy white underbase.
Test Tubes provide cotton or poly/cotton material that can be printed, flashed, and fully cured without shrinking beneath the flash unit. Final approval should still be performed on the actual production garment.
Signs Of A Proper Flash
A correctly flashed print should feel dry enough on the surface that the following screen does not remove or smear the ink. It should not appear excessively glossy, flattened, scorched, or fully hardened.
During the next print stroke, watch for:
- Ink collecting on the back of the screen
- The garment sticking to the mesh
- The underbase shifting or smearing
- The top color sliding across the surface
- Poor adhesion between ink layers
Some screen pickup can also be caused by low tension, excessive pressure, or an overly heavy deposit, so do not automatically add more flash time.
Signs The Ink Is Under-Flashed
Under-flashed ink may remain wet or tacky enough to transfer onto the following screen.
Common symptoms include:
- White ink building up on the backs of color screens
- Smearing or movement during the next print stroke
- Loss of fine detail
- The garment sticking to the next screen
- Colors becoming contaminated by the underbase
Increase the flash exposure slightly, but first confirm that the underbase is not unnecessarily thick. A heavy deposit may need more heat than the garment can safely tolerate.
Signs The Ink Is Over-Flashed
Over-flashing causes more problems than simply wasting a few seconds.
Warning signs include:
- A shiny, rubbery, or fully cured underbase
- Top colors sliding instead of gripping
- Poor bonding between printed layers
- The garment shrinking or scorching
- Polyester dye beginning to migrate
- Platens becoming excessively hot
- Ink gelling inside the next screen
Reduce flash time, increase the distance from the heater, lower the power when controls are available, or choose an ink that gels more efficiently.
Platen Temperature Changes During Production
A flash setting that works on the first shirt may become excessive after the press has been running for several minutes. Platens absorb heat from repeated flashing and begin warming each garment from below.
As platen temperature rises, the ink reaches its gel point faster. If flash time remains unchanged, later shirts may receive much more heat than the first shirts.
Check flash performance after the press reaches normal production temperature. You may need to reduce exposure once the platens are warm.
A stable production routine may include:
- Preheating the press before final setup
- Checking the first several garments closely
- Reducing flash time as platen heat increases
- Monitoring results after production pauses
- Keeping unused screens away from the flash
Garment Color And Fabric Affect Flashing
Dark garments absorb radiant heat faster than light garments. A black polyester shirt may become much hotter than a white cotton shirt under the same flash setting.
Polyester requires particular care because excessive heat can cause:
- Dye migration
- Shrinking
- Scorching
- Ghosting
- Glossy platen marks
- Fabric discoloration
Test every new garment style and color. Two polyester shirts that look similar may react differently because of their dyes and construction.
Ink Deposit Has A Major Effect
A thick white underbase requires more heat than a thin top color. Deposit thickness is affected by mesh count, stencil thickness, squeegee hardness, pressure, and the number of print strokes.
Before increasing flash heat, consider whether the underbase can be controlled through:
- A more appropriate mesh count
- A thinner stencil
- A sharper squeegee
- Less pressure
- One effective print stroke instead of two
A smoother, controlled deposit generally flashes faster and provides a better surface for the following colors.
Low-Cure And Fast-Flash Inks Can Improve Production
Some ink formulas are designed to gel quickly or cure at lower temperatures. These inks can reduce flash time and help protect sensitive fabrics.
Our ELT-X Series combines low-temperature performance, strong opacity, bleed resistance, and an extremely fast flash time. It is useful when printing dark cotton, polyester, and other fabrics where controlling both production speed and heat exposure is important.
A fast-flashing ink still needs testing. Using a faster formula but leaving the flash settings unchanged can simply create a faster over-flash.
Flash Unit Distance And Leveling
The flash should be level with the platen so the entire image receives reasonably even heat. If one side is closer, part of the print may overheat while the opposite side remains wet.
Distance also matters. Moving the unit closer increases heat intensity quickly. Make small adjustments and record the final height.
BBC Black Flash Dryers include a leveling mechanism that helps keep the heater parallel with the platen. Available models provide different sizes and wattages for manual and production applications.
For compatible models, BBC Black Flash Heat Controls allow output to be adjusted rather than relying only on distance and exposure time.
Do Not Park A Screen Over The Flash
Heat rising from the flash can warm the next screen and begin gelling ink inside the mesh. This can cause clogged detail, buildup, and small cured particles.
Position or rotate the flash so screens are not exposed unnecessarily. During pauses, move screens and ink away from direct heat.
If ink begins thickening in the screen during production, check press temperature before adding reducer. The problem may be excessive heat rather than ink viscosity.
Flash Temperature Does Not Prove Final Cure
A successful flash only means the print is ready for the next color. The completed garment must still pass through the dryer and reach full cure throughout the entire ink deposit.
An infrared temperature reading can help monitor the surface, but it does not confirm that the bottom of a thick deposit reached cure temperature.
Thermolabels provide a simple way to document dryer temperatures. Place them on test garments or selected production pieces, then retain the labels with the work order. Combine temperature records with wash testing before approving the final cure.
Production Optimization Checklist
- Use the lowest flash exposure that gels the ink
- Keep flash distance and angle consistent
- Test after the platens reach production temperature
- Control the underbase deposit before adding more heat
- Watch dark and polyester garments closely
- Keep screens and ink away from unnecessary flash heat
- Check for screen pickup after each adjustment
- Document flash time, distance, power, and garment type
- Verify final cure separately in the conveyor dryer
Final Thoughts
Getting flash temperature right means using enough heat to gel the ink surface without fully curing or overheating it. There is no universal setting because ink formulation, deposit thickness, garment color, platen temperature, flash distance, and production speed all affect the result.
Begin with a short exposure and increase it gradually. Watch how the next screen interacts with the underbase, then reduce heat whenever the print has become harder, glossier, or hotter than necessary.
A properly optimized flash improves registration, reduces screen buildup, protects garments, and shortens production time. Flash only enough to continue printing, then complete and verify the full cure after the final color.