800.942.4447


 Addresses
 Wallet
 Orders
 Invoices
 Item History
 Favorites
 Change Password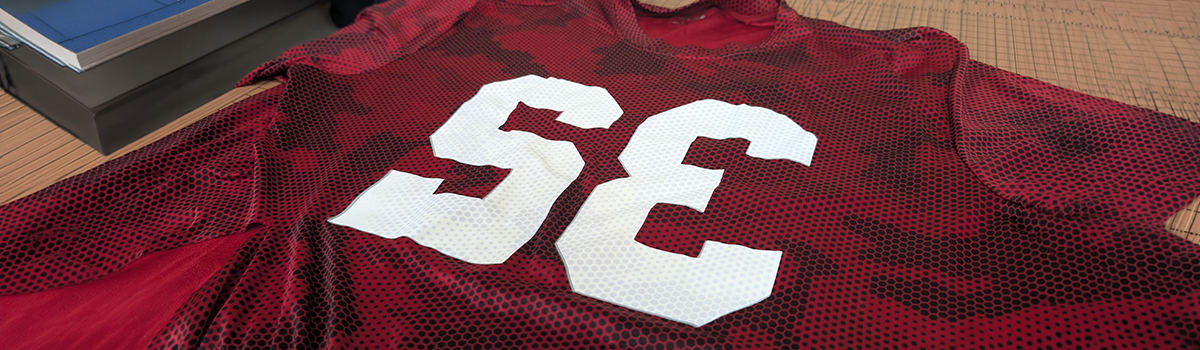
Few things frustrate printers more than seeing a bright white print turn pink, gray, or yellow hours after it leaves the dryer. This problem, known as dye migration, is common when printing polyester garments. At One Stroke Inks, we help shops prevent bleed-through every day. Knowing why it happens and how to control it can save time, money, and a lot of shirts.
What Is Dye Migration?
Dye migration happens when heat activates the dyes in a garment. Those dyes can move into the printed ink and change its color. The problem may appear immediately, but it can also develop several hours after printing. A white print may turn pink on a red shirt, gray on a black shirt, or blue on a navy garment. Dye migration is not the same as poor ink coverage. Adding more ink layers may make the print look brighter at first, but it will not necessarily stop the garment dye from moving into the ink.
Which Fabrics Are Most Likely to Bleed?
Polyester is the main source of dye migration. High-risk materials include:
- 100% polyester
- Performance wear
- Athletic uniforms
- Moisture-wicking fabrics
- Polyester blends
- Sublimated garments
- Dark or heavily dyed polyester
- Some pigment dyed and garment dyed apparel
Cotton is much less likely to experience traditional dye migration because its dyes are usually more stable. However, garment-dyed cotton, unusual finishes, and certain fashion fabrics can still react to heat or ink chemistry. Every unfamiliar garment should be tested before production.
Heat Causes the Problem
Plastisol ink needs heat to cure, but too much heat activates polyester dyes. The hotter the garment gets, the more likely those dyes will migrate into the print. Heat exposure can occur at both the flash unit and the conveyor dryer. That is why controlling the temperature and the amount of time the garment remains under heat is important.
Choose an Ink Made for the Appropriate Garment
Standard plastisol works well on cotton but may not protect against polyester dyes. Low-bleed inks contain dye blockers and lower cure temperatures to help reduce migration.
What One Stroke Inks recommends:
- ELT Series for versatile low-cure printing across many fabrics.
- ELT-S Series when softness, stretch, and bleed resistance are important.
- ELT-X Series for maximum opacity and bleed resistance on difficult polyester.
- Underbase LC White when a low-cure white underbase is appropriate for the garment and print system
No single series is the best choice for every polyester garment. The correct formula depends on the fabric, garment color, dye process, artwork, equipment, and desired finish.
Lower Cure Temperatures Help
Lower curing temperatures reduce the amount of heat applied to the garment. This can lower the chance of activating polyester dyes. Our ELT Series (Extreme Low Temperature) is designed for this purpose. It cures at a lower temperature than standard plastisol, which helps keep polyester dyes from rising into the print.
Any time you adjust cure settings, run wash tests to confirm the ink reaches full cure.
Avoid Over-Flashing
Many migration issues start at the flash unit. Over-flashing can heat the garment enough to activate dyes before the shirt reaches the dryer. The purpose of flashing is to gel the surface of the ink enough for the next color to print cleanly. The ink does not need to receive a complete cure under the flash. Proper flash settings help keep heat exposure under control.
Use a Blocking Underbase
A white underbase provides coverage, but opacity alone does not make an ink a true dye blocker. Difficult polyester and sublimated garments may require an underbase specifically designed to block aggressive dyes. A blocking underbase is often the first line of defense. Products such as Underbase LC White provide opacity and help resist dye migration. A strong underbase keeps garment dyes from reaching your top colors.
Digital Gray Underbase and Digital Black Underbase are underbases that are often used because they create a stronger blocking between the garment and the top colors. Always follow the technical data sheet for the underbase and top ink. Give us a call if you are unsure which combination is best for the garment.
Beware of Sublimated Garments
Sublimated jerseys and performance fabrics are the most difficult garments to print. Sublimation dyes are extremely aggressive and can migrate through multiple ink layers. Always test these garments before production. Even the best low-bleed inks cannot guarantee success on every sublimated fabric.
Test Before Running Production
Different manufacturers use different dyes, and two shirts that look identical may behave very differently under heat. Before production:
- Print the actual garment or a representative sample.
- Use the planned underbase, mesh, stencil, and ink deposit.
- Flash and cure the sample with the intended settings.
- Allow the garment to cool completely.
- Inspect the color, opacity, adhesion, and texture.
- Let the sample sit for at least 24 hours.
- Check it again for delayed dye migration.
- Wash and dry the sample.
- Inspect the print again before beginning the full run.
Many migration issues do not appear immediately.
Dark Colors Present Higher Risk
Red, maroon, black, navy, and athletic colors are more likely to bleed. White prints on these garments should always be tested carefully, especially when higher heat is involved.
Prevention Is Easier Than Reprinting
Before printing, make sure that you are:
- Using ink designed for the garment
- Selecting a true dye blocking underbase when needed
- Applying the recommended ink deposit
- Keeping flash temperatures under control
- Curing at the lowest temperature recommended for the ink
- Measuring the actual production temperature
- Testing the finished print after it cools
- Checking again after 24 hours
- Performing a wash test
- Recording successful settings for repeat orders
At One Stroke Inks, we formulate several products for different polyester challenges. If you are unsure which ink or underbase to use, give us a call with the garment material, color, artwork, and curing setup. We can help you compare the options and select a strong starting point. Choosing the right ink, controlling the heat, and testing the actual garment can greatly reduce dye migration and help your prints remain bright, durable, and true to their original color.